Finishing & Care
Butcher Block Finishing & Care Instructions
NOTE: We recommend permanently finishing/sealing the top of your butcher block, rather than regularly conditioning it.
When finishing walnut, it is recommended to finish the bottom side first to ensure the applied product gives you your desired look and finish
When you purchase a Forever Joint Tops butcher block from us, your product will come with a non-permanent coat of FDA-approved mineral oil.
This will give you the option to use your butcher block as a cutting surface or to finish/seal it with an oil-based product to get a strong, durable finish that will last for years.
The instructions for care differ depending on whether you are using your butcher block top as a cutting surface or not, so you’ll want to keep this in mind before you proceed to ensure the best outcome. This helpful page will teach you:
How to Permanently Finish & Seal Your Butcher Block How to Condition Your Butcher Block How to Clean Your Butcher Block
How to Permanently Finish & Seal Your Butcher Block
If you’re looking for less maintenance and complementary beauty to your natural wood butcher block countertops, you likely will want a permanent sealer to help lessen the routine work. To seal your butcher block, we recommend using Waterlox® as a permanent finish and/or sealer.
Butcher Block Sealer - Waterlox®
One of the most effective butcher block sealers available on the market is Waterlox®. Waterlox® is a high-grade Tung oil and resin blend with a water-resistant finish that we've been recommending to our customers for years. Waterlox® butcher block sealer does a great job showcasing the natural beauty of wood while also providing long-lasting, durable protection.
In addition, Waterlox® butcher block sealer is food-safe, leaving the surface of your butcher block countertop non-toxic and ultra-safe for cooking, baking, preparing, and serving food on. However, you will want to refrain from using Waterlox® for cutting on directly.
Please note: Do not use Waterlox® on surfaces that you intend to cut on directly.
Additionally, Waterlox® butcher block sealer is heat-resistant and won't crack, peel, or chip. It is known for its great ability to lock out and protect against water, making it the perfect choice for butcher block surfaces.
Please note: Once you use Waterlox®, no regular oiling/conditioning is needed.
Additional Waterlox® Information
Waterlox® comes in multiple different sheens. Most likely, the Waterlox® Original Sealer/Finish will be a good start for your butcher block.
When applied, Waterlox® butcher block sealer will alter the coloration of the wood. It is an amber color and will slightly darken and alter the color of the wood, depending on the type of wood it’s applied to. Regardless, Waterlox® still maintains the natural beauty of the wood.
Butcher Block Sealer Application Instructions - Applying Waterlox®
- To start applying Waterlox® to your butcher block, you first apply the initial coat of the Sealer/Finish generously, using a China bristle brush or foam applicator.
- Don’t wipe on or wipe off (application using a rag will result in 1/3 to 1/2 as much film build as brushing). Using this application method is best since it will provide maximum film build, which is needed for effective water protection. When finished, you can let the first coat of Waterlox® dry overnight.
- Next, apply the second coat of the butcher block sealer (repeat step 1). Allow the second coat to dry overnight. The next day, you will need to lightly sand the surface of the butcher block with 320-grit or 3/0 or 4/0 steel wool to smooth out the finish. Tack with mineral spirits.
- Next, you will apply the first coat of your topcoat of choice. These can be either Sealer/Finish, Satin, or High Gloss. Now, you will need to let it dry overnight.
- Once dry, the following day, you will lightly sand with 4/0 steel wool or 320 – 400 grit sandpaper. Tack with mineral spirits.
- Apply the last coat of topcoat. Allow the surface of your butcher block to cure for at least 72 to 96 hours. Do not use the surface during the cure time.
- Are you planning on staining your butcher block? You can add stain to your first coat of Waterlox® Original Sealer/Finish. At a 1 to 4 mix, the butcher block wood will be about half as dark as stain applied to bare wood. Some of our customers choose to apply a second stain or Waterlox® coat to further darken light wood. Note that a second coat of stain will be more difficult to apply evenly.
Please Note: Before you start using Waterlox® as a butcher block sealer, it's important that you read and follow the instructions on the can. For best results, please follow their step-by-step instructions on their website.
Cleaning with Waterlox®
Please allow seven days for the Waterlox® to completely cure before cleaning. It's recommended to use a damp (soft, lint-free) rag on the surface as needed. If heavier cleaning is required you can use Waterlox® Original Cleaner Concentrate (follow instructions on the label), or a non-abrasive diluted cleaner. Please avoid using ammonia and bleach products.
How to Condition Your Butcher Block
Butcher Block Non-Cutting Surfaces
Need to condition your butcher block? Waterlox® is an extremely water-resistant sealer/finish that produces excellent results while being very easy to work with. This is a great product if your butcher block top is near a sink or any water source. Be sure to apply on the bottom side as well.
Other finishes can do the job well enough, but be sure you that you choose only an oil-based product to avoid problems with the food-safe mineral oil with which your butcher block has already been treated.
Butcher Block Cutting Surfaces
For cutting surfaces, be sure to use a high-quality bee’s wax or a food-safe butcher block oil. This must be done regularly to keep your top from drying out and cracking on the ends. Treat the bottom and ends of the butcher block as well. Some customers seal just the bottom with Waterlox®, and then apply butcher block oil on the top to make it easier to keep sealed.
If your butcher block cutting board or surface appears dry or “chalky,” it’s definitely time to treat it again. Remember, it never hurts to do this more often! Keeping it well-seasoned is critical to avoid cracking.
How to Regularly Clean Your Butcher Block
Studies show that hard wood has naturally-occurring antimicrobial substances that make it more sanitary than plastic, especially as the cutting boards age. So, using bleach or other harsh chemicals is not only unnecessary, it could even damage your butcher block cutting board or other butcher block cutting surface.
Steps to Clean Your Butcher Block:
- A mild dish soap for cleaning is all you need.
- If something is stuck on the butcher block surface, a nylon scraper or plastic scrubbing sponge is less likely to cause cosmetic damage than a metal tool.
- To sanitize, white vinegar is a good choice.
To keep your butcher block investment timelessly beautiful, you’ll also want to prevent it from drying out or cracking. Complete this simple process regularly for the best results for your butcher block.
A high-quality bee’s wax or butcher block oil are the best options. Treat the bottom and sides of your butcher block top or butcher block cutting board as well as the top to maintain a thorough seal.
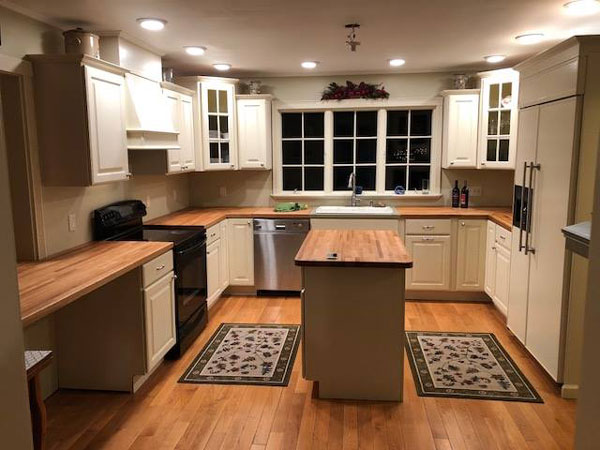
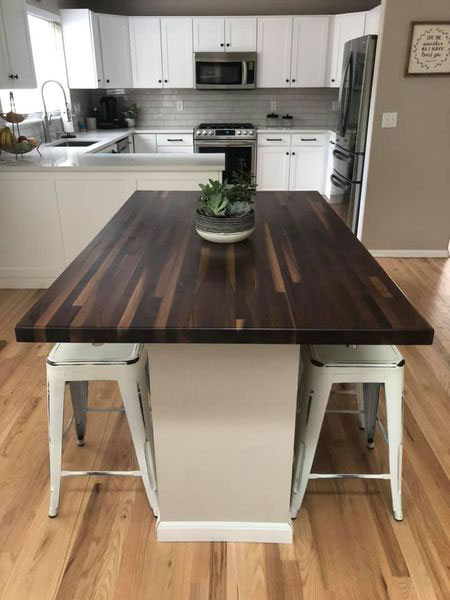
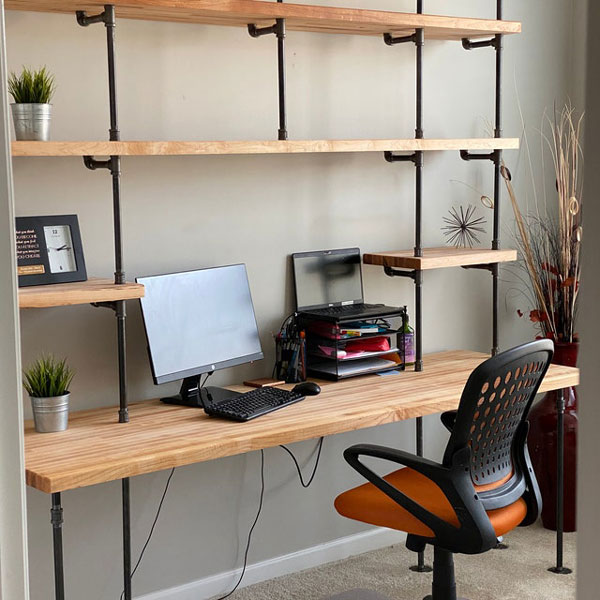
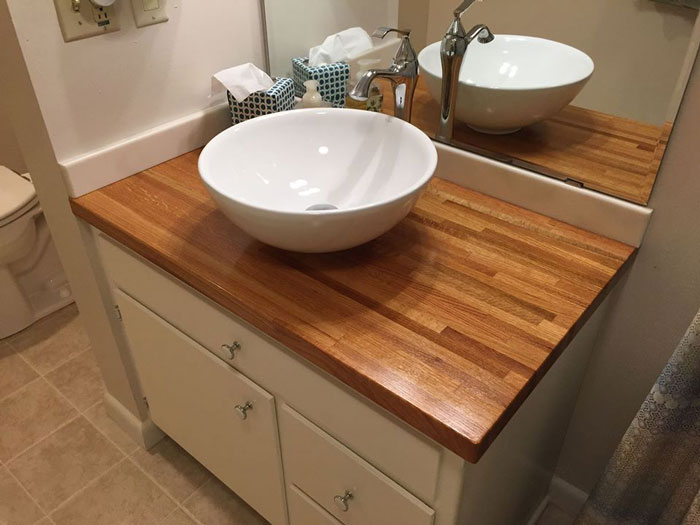
Forever Joint Tops is your source for beautiful custom-made countertops, tables, desks, shelves, and more.
Sources:
- Mohammad, Ghada & Al-Taee, Sura. (2019). Comparison of Various Types of Cutting Boards in Bacterial Contamination.
- Cliver, Dean. (2006). Cutting boards in Salmonella cross-contamination. Journal of AOAC International. 89. 538-42.
- 15 Creative Ways to Use Your Butcher Block Floating Shelves

